Showing posts with label Project Monday. Show all posts

Monday, February 3, 2014

Project Monday

Painted Furniture

A few weeks ago at the Atlanta Market I was fortunate to meet with 
Amy Howard - a beautiful furniture maker - who has a line of paint and finishes she markets as 'Amy Howard at Home'.  Go here to see my post last year about her and all of the finishes.
At market I was thrilled to take part in a hands-on demo which was great fun.

 It's taken me a year to finally get the courage to paint my grandmother's hutch, which is a solid piece of furniture in mahogany.  The s-curved glass with the leaded window pane is not something that can be found these days.  While beautiful in its day, it just isn't 'me'.

I thought I would 'practice' on a tea cart - that was grandma's too - to see how brave I am.
It all comes apart which helps for those hard to reach places. 
I'm using the 'One-Step' paint process which is a chalk paint that can be painted over any surface, no sanding or prep required. My fave for sure. It does not need to be sealed but I like to have a bit of depth rather than a flat finish.
One coat, I did long strokes. The paint can be a bit thick, a drop of water helps.

Two coats on everything.
A touch of gold adds so much; I taped off the top edge of both trays, then painted with 'guilding size' which makes the leafing stick and waited 20 minutes for it to become 'tachy'. 
Next, lay the gold leaf over, it doesn't have to be perfect (which is my nature) as it's nice to have sort of a crackled look.
After all the leafing is finished - using a brush - get all of the flecks off. 
That stuff goes everywhere and since my kitchen is my workroom, I'll be finding 'gold' for a while!
Next is waxing, clear and then dark. Soft wax is best, I had some Annie Sloan in the clear and bought Amy's dark. This is the hard part. The clear is great because obviously it cannot be seen but when that dark goes on it isn't as smooth. Both go on with a brush and then buffed a bit, the key is to 'off-load' the wax on a piece of cardboard or something similar to get the blobs off of the edges of the brush. Even with doing that there are dark spots that I couldn't smooth out. My perfectionistic personality really has to let go a bit.  
Amy likes to use this 'dust of ages' to get into the crevices (I would say best for pieces with highs and lows in the wood) which goes on after the wax and then buff with a soft rag for a pretty sheen.
Here's the top tray - you can see the darker spots - definitely need to perfect this technique a bit more before the hutch.
All in all, it turned out pretty well - I would prefer not to have the dark spots - but honestly they aren't as noticeable in person.


Moore Designs would love to help you turn your house into a lovely home.
E-Design services available.

Share/Save/Bookmark

Monday, May 20, 2013

Project Monday

I've had several projects going on around here at the casa.
Last year I bought these outdoor director chairs at HomeGoods and left them out all winter.  
Time for a change...so I had some new covers made. Will definitely bring inside this winter!
I need to 'work' on the outdoor table.  A HUGE disappointment from Ballards, stain not holding up well at all.
I learned from Tara Dillard about 'vanishing thresholds' meaning your outdoors should be an extension of whichever room looks out at the garden.

Next...the front door...
I stripped the varnish off and painted it a couple of years ago. Go here to see.  It really takes a beating in the heat. 
A friend of mine gave me this 'sander deglosser' and I thought I would give it a try.
It takes the sheen off of existing paint so that new paint will adhere.  I really didn't have it in me to strip the whole thing down again. At the bottom where the paint was bubbling off I used a sanding block to smooth the edges.
I decided to darken up the paint a bit.
Turned out great.  At the bottom where it looks like I 'missed a spot', it's actually where the weather stripping is folded under.  Mr. MD isn't around to help with that, will put on his 'to do' list! 
How is your front door looking?

Frame for powder bath mirror.
I just did one for a guest room bath a few weeks ago.
I picked the same moulding with the intent of a different finish. 
Starting with ASCP Coco...
...I used some silver and gold 'rub 'n' buff' paint rubbing on with my fingers, then used a gray/black craft paint and 'dry-brushed' it on.
Don't forget to paint the backside.
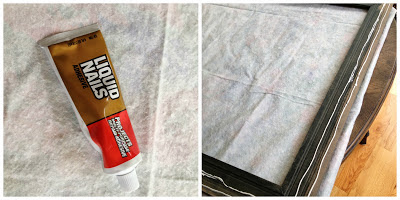
Make sure glue is on outside so it doesn't show once mounted.

The boards were really long and one had a slight bow in it, Mr. MD thought he could get it out by wetting down the wood and putting weight on it to straighten it out.  Unfortunately it didn't work.  :(  I now have heavy books on all corners and am leaving for a week and will try again to mount this weekend. I'm a 'get 'er dun' girl and I don't like these little hang-ups! Sure don't want to have to start over.

Now is a great time to get some of your outdoor projects done before it gets too hot outside!


Do you need help updating or creating new spaces in your home?  Call MD, we'll pull it together for you. Don't let distance be a barrier, we can design for you via the web!


Share/Save/Bookmark

Tuesday, April 16, 2013

Project Monday

I bought this dresser and hutch a few years ago for my office from Christine's Creations in Woodstock, GA.  Christine's store is one of my favorite places to go to find fun things for the home.

My office is in dire need of an update so I decided I would pull out my paint brush and try a different colored chalk paint on this dresser and hutch. I use the dresser to keep paint fan decks, fabric samples and office supplies and the hutch has served me well for design books and catalogs from vendors.
  I chose Coco which is sort of a gray/brown. After removing the hardware, I sanded down the rough spots.

I painted the whole piece and thought I would use dark wax to finish. Oh my, didn't like it at all- too blotchy - so in keeping with my tradition of painting, not being satisfied and starting over, here I was again.
After painting with the coco as a base cover, I had in mind to try to make the finish appear like old wood.  I painted random streaks of raw umber craft paint and robin egg blue chalk paint.
You can see here how I worked the two together with a paint brush. This is one of those projects too where once I got into the compartments in the hutch I wondered what the heck I had gotten myself into.
Sometimes a little dab of water was needed to get the paint to move.
I am pleased how I was able to accomplish a bit of a grainy wood look.
This time I used clear wax!  Obviously it doesn't show where it may not go on perfectly. "Mo bettah"!

All finished except for the hardware.  I'll keep you posted on what I decide as well as how the room shapes up. 


Do you need help updating or creating new spaces in your home?  Call MD, we'll pull it together for you. Don't let distance be a barrier, we can design for you via the web!

Follow on Pinterest.
Follow on Facebook.
Follow on Twitter @RenaeScottMoore 
Follow on Instagram mooredesigns


Share/Save/Bookmark

Monday, January 21, 2013

Project Monday


Usually my Project Monday's are home decor projects but today I thought I would show you another project I just finished. I have been doing a fair amount of knitting, mainly baby hats but my son wanted a 'slouchy' hat. I have to say I think it turned out well and know he is going to enjoy it the remainder of the winter! (Posting on iPad and cannot place my pix). The pink hat is a baby hat I did a while back for a sweet little friend of mine. Just heard my grandson needs a warm hat so I've got to get busy!


Monday, October 1, 2012

Project Monday

A little of this and that!

Finishing up final fabric selections for a dining room project.  Window treatments and upholstery for the chairs.
We are rolling along and first install of other rooms will be in a couple of weeks. I know you'll love the home when we are finished...southern elegance for sure!

In my own home:
I have worked phase by phase in our home over the last 3 years getting rid of the paint we inherited when we bought it. I love the lighter hue with the contrast of the dark doors.
Heading down to the basement, the 'brown paper bag' color is finally gone!
My contribution was painting the railing while the painters did their magic.
We also had a contractor close off a hall that was wasted space by framing and adding the double doors.  We will be using it for storage and will put in non-permanant shelving that we can take with us when we move. Flooring was ordered today.  The door in the back goes to a small room and I had already painted it black, and of course the new doors are being painted (by the painter!). 
 One coat down, one to go.  I bought some door pulls to put on instead of door knobs.  LOVE getting these little projects done!
My painter said my house looks very 'Californian'.  I'm a California girl, so I took that as a compliment!

What projects are you working on?

Do you need help turning you house into a lovely home?
Contact MD for design services.

Follow on Pinterest.
Follow on Facebook.
Follow on Twitter @RenaeScottMoore


Share/Save/Bookmark

Monday, September 17, 2012

Project Monday

I flew to the Pacific Northwest a couple of weeks ago to visit my son and daughter-in law who are expecting their first child very soon. 
I snapped this from the car of Mt. Hood in the distance with the Columbia River in the foreground. The weather was perfect the entire week I was there, didn't break out into a sweat once....it was glorious!
My daughter-in-law and I went the very next day to one of her favorite little antique stores and we scored this table and 4 chairs.  I had an idea!

She is a girl after my own heart in liking the gray tones.  We used a Valspar gray (have no clue the name of the color) and I mixed with a bit of white chalk paint so I didn't have to sand.
Next was a wash made of black craft paint and water which finished in a dark gray.

After days of work and finished with a spray urethane, this is how they turned out.  Not too bad and the kids are happy.
DIL had an idea to use this screen door horizontally above her guest bed. I love this door...reminded me of one at my grandma's house.
She has a white duvet with blue toile and so she wanted to use blue.  You can see an ever so faint brown swipe across that I put as a test.  She liked and thought some white would be good too.
I came up with this but she favored the darker blue better so we fixed it.  The blue was toned down with a little black and brown brushed in places. 
(didn't get a pix)
Her most favorite was getting the nursery all together...she's definitely nesting! Her parents got them the glider and some sweet soul crocheted that beautiful blanket. We found the frames at the same antique store. My son put together all the furniture, have you ever looked at those directions?  Oy.
She had a vision and all of what went into it and I helped her get it all together.  The rustic piece in the corner is from another shop we didn't get to.
They are all set and ready for the little one's arrival.


Do you need help turning you house into a lovely home?
Contact MD for design services.

Follow on Pinterest.
Follow on Facebook.
Follow on Twitter @RenaeScottMoore

Share/Save/Bookmark